
Where to Find All Udumbara Pistils in Genshin Impact
The Pale Flame World Quest in Genshin Impact’s Girdle of the Sands requires six Udumbara Pistils—here’s how to find each one easily.
Hey fellow Travelers! If you’ve found yourself knee-deep in the lush, mystical Girdle of the Sands back in Sumeru, chances are you’ve bumped into the Pale Flame World Quest. It’s a total vibe until you hit the part where you need six Udumbara Pistils to awaken those Residual Pari in the Fravashi Trees. Suddenly, the game throws a curveball and you’re left scratching your head, wondering where those sneaky purple blooms are hiding. I’ve been there—spent way too long gliding around that swamp like a headless chicken. But once you’ve got the hang of it, snagging all six Udumbara Pistils becomes a cakewalk. So let me break it down for you, complete with maps, the Sorush trick, and the exact spots so you can breeze through this quest without losing your marbles.
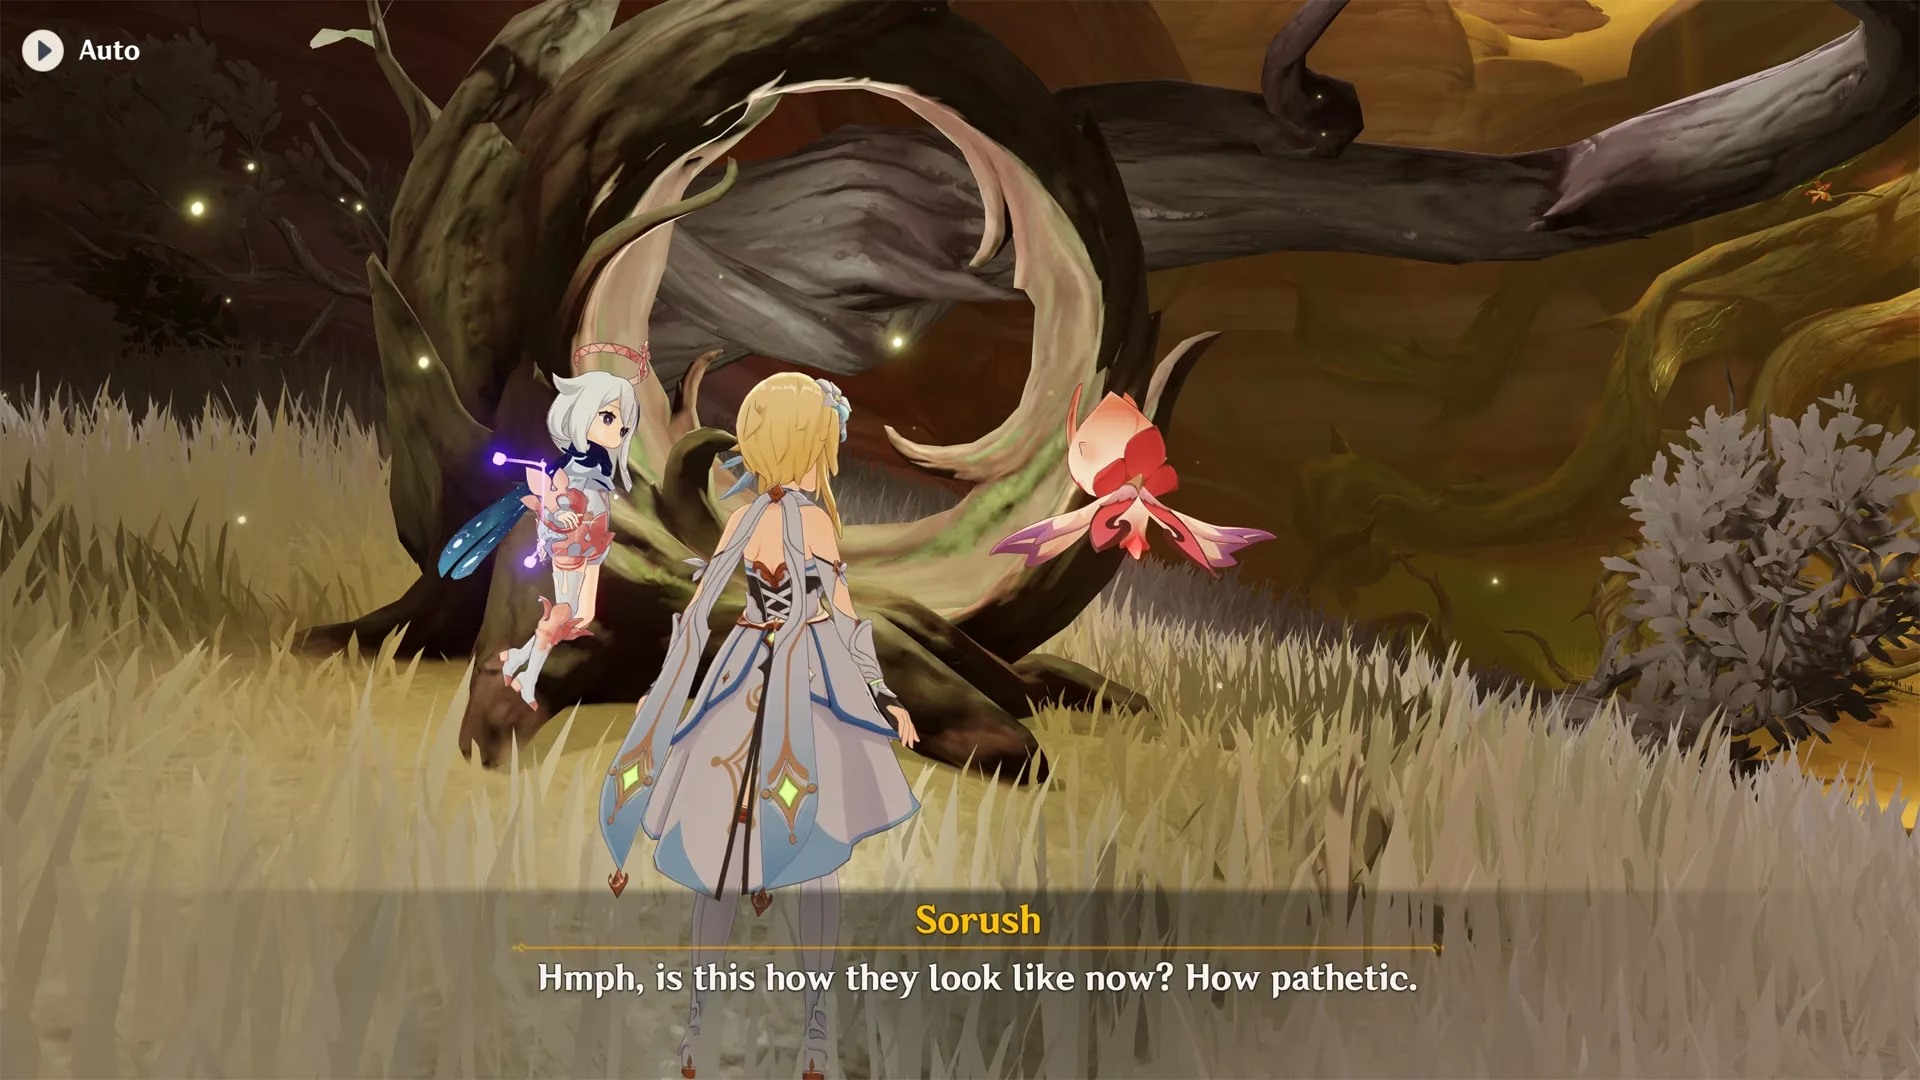
First off, let’s get our bearings. The Pale Flame quest series was added way back in version 3.6, but even in 2026 it remains a rite of passage for anyone still exploring every nook and cranny of Teyvat. The action all takes place in the Asipattravana Swamp, which is the northeastern chunk of the Girdle of the Sands. To even tackle this quest, you need to have unlocked the Sorush Gadget from ‘The Splendorous Sky That Day’ quest. No Sorush? No Udumbara. It’s that simple. Once you’ve got the little flying buddy, you’re ready to hunt.
Now, what does an Udumbara even look like before it blooms? Picture a delicate drawing of a green heart surrounded by a ring of orange petals, plastered on cliffsides like some ancient graffiti. It’s subtle, which is why I missed it a dozen times initially. When you spot one (and you will, if you follow my directions), you can’t just waltz up and grab it. You’ve got to force it to bloom. Here’s the clutch mechanic: equip the Sorush Gadget, switch to Sorush mode, and fly over to the heart-shaped marking. Then, hold down the skill button—don’t just tap it, really lean into that hold—so Sorush hovers close and forces the Udumbara to unfurl into a majestic purple flower. If you let go too early, the thing shrinks back and you’ll be back to square one. Trust me, I learned that the hard way. After it blooms, switch to your active character, climb or glide onto that flower, and snatch the Udumbara Pistil. It’s a bit of a dance, but once you get into the rhythm, it’s actually pretty satisfying.
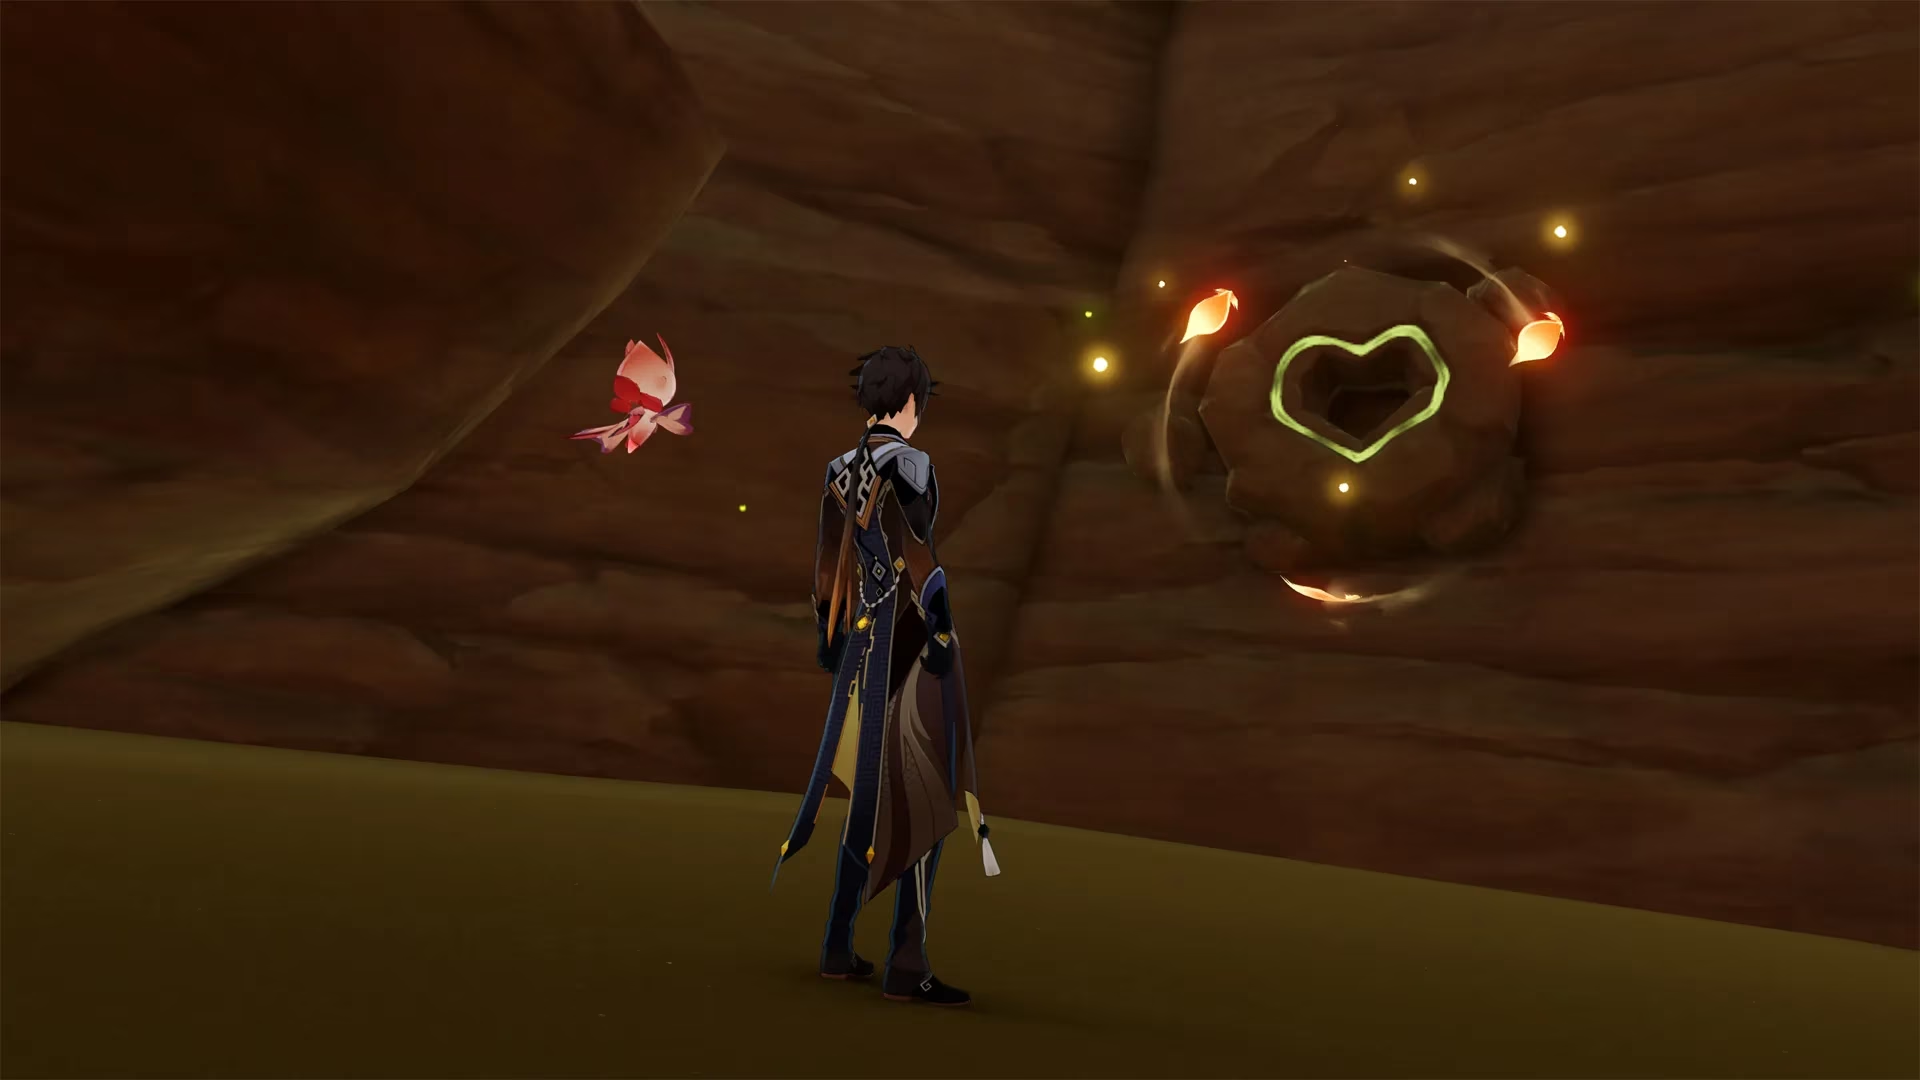
There are exactly six Udumbara Pistils up for grabs, and they’re all scattered around the Asipattravana Swamp. The area is a vertical maze of gorges, overhangs, and vine-draped cliffs, so a good map is your best friend. I’ve marked every spot on the image below, so keep it handy as you trek through.
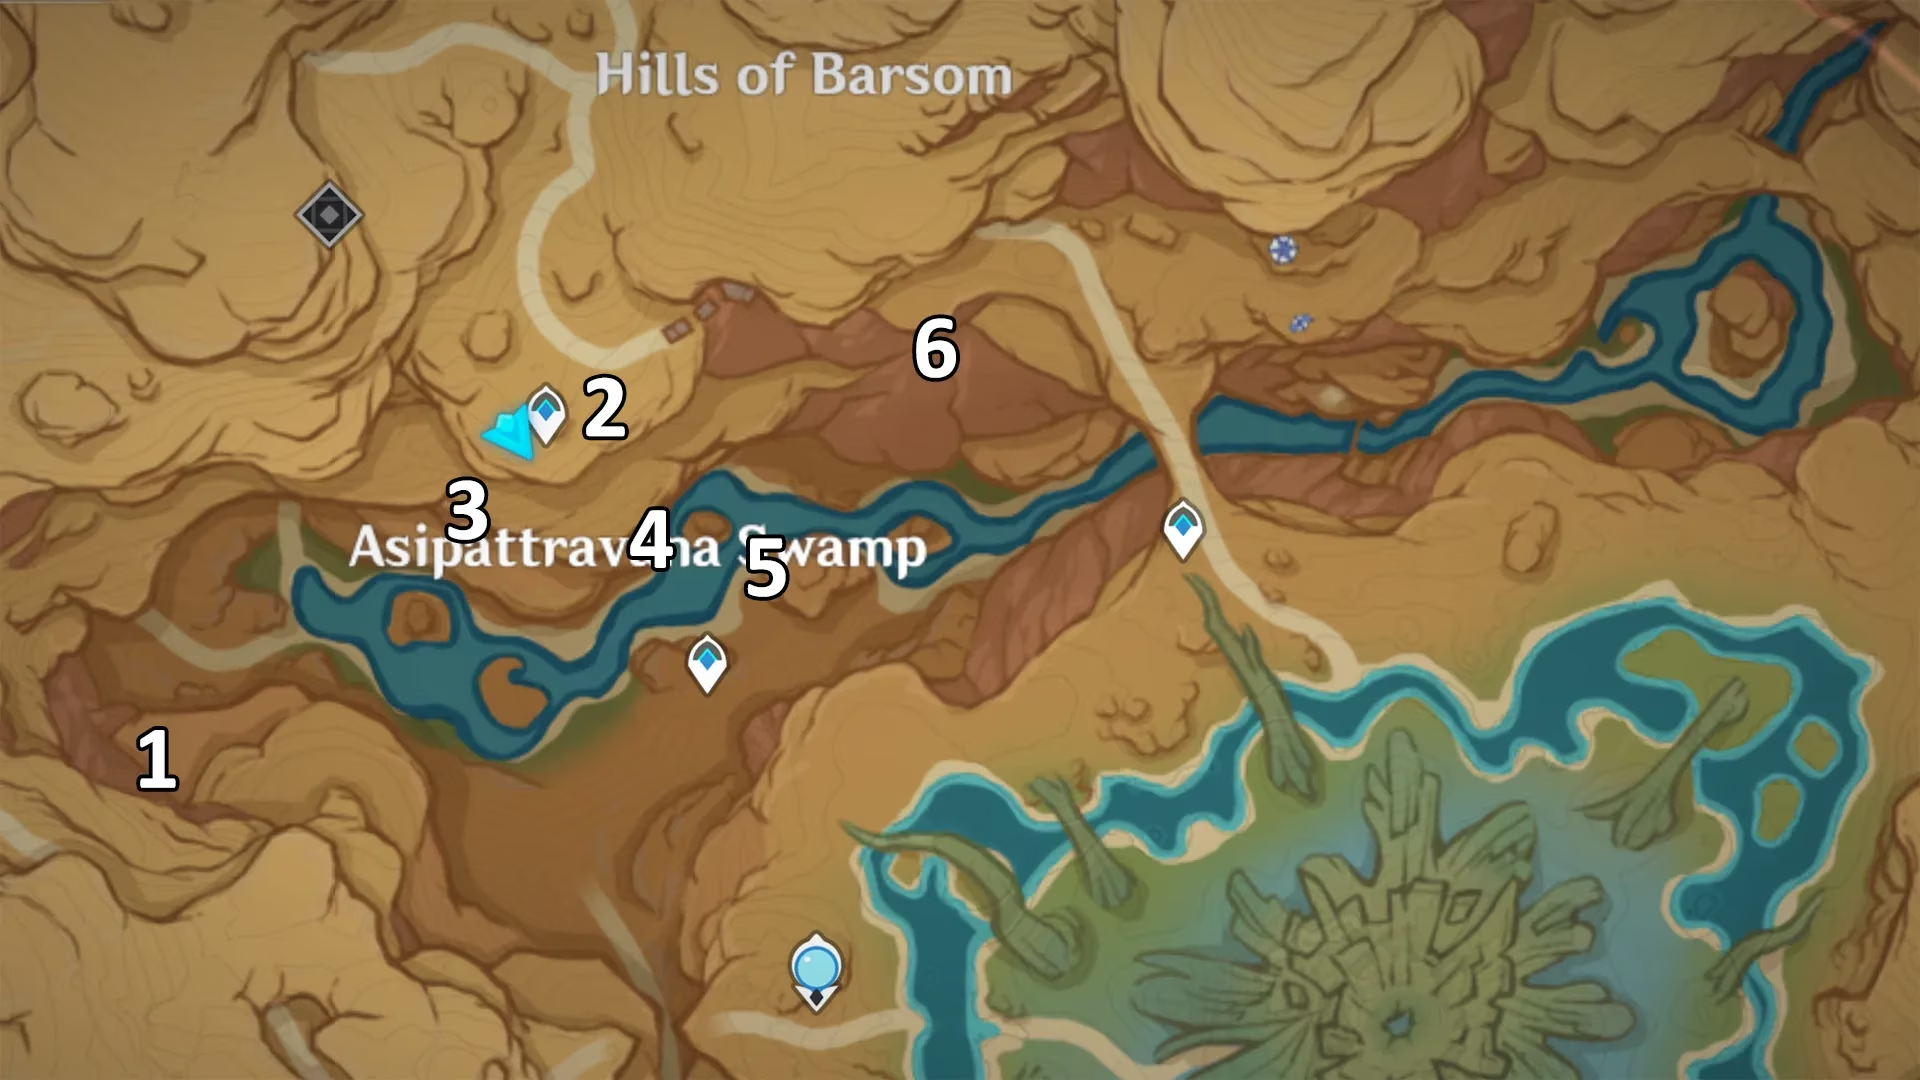
Location 1: The Ledge Mid-Gorge
The first Udumbara is perched on a ledge about halfway down the main ravine. I like to glide in from the cliff tops to the north—it’s a smooth, scenic descent. Watch out for a couple of minor Fungi hanging around; they’re not tough, but they can be a nuisance if you’re trying to focus. Once you deal with them, park Sorush on the heart and make it bloom.
Location 2: Under the Overhang
This one is sneaky. From the nearby Teleport Waypoint, drop down one level and aim for a ledge tucked beneath an overhanging rock. Look high on the wall: the Udumbara drawing is practically hugging the stone. The quickest way up is to latch onto the Four-Leaf Sigils floating nearby. Pop Sorush into position, hold the skill, and the flower will open right on cue.
Location 3: Just Above the Ravine Floor
Starting again from that same Teleport Waypoint, this time you need to glide one level lower than you did for Location 2. You’re now not far above the deepest part of the gorge. The Udumbara is on a vertical rock face. You can either climb up once Sorush does its thing, or use the nearest Four-Leaf Sigil to zip upward. It’s a tight spot, but nothing a seasoned adventurer can’t handle.
Location 4: Low on the Rock Wall
Here’s another one hugging the wall just a smidge above the ravine’s belly. Honestly, it feels like the developers wanted to test our climbing stamina. Gliding down from a higher ledge works like a charm. Once you’ve bloomed it, you can pretty much just hop on and nab the pistil.
Location 5: The Lone Rock at the Bottom
Directly opposite Location 4, perched on a solitary rock formation at the very bottom of the ravine. The real kicker? You can stand right on top of the rock while using Sorush to trigger the bloom. It’s one of the easiest ones, so if you’ve been having a rough go, save this as a little morale boost.
Location 6: Cliffside Southeast
Teleport to the waypoint in the southeast and shuffle north. You’ll spot the familiar green heart on the lower cliff wall even before you get too close. I recommend landing on the ledge to the east of the Udumbara, the one where a Hilichurl is usually napping. Deal with him (or just ignore him if you’re feeling stealthy), then let Sorush work its magic.
With all six Udumbara Pistils safely in your inventory, you’re golden. Head back to the Fravashi Trees and sacrifice those bad boys to awaken the Residual Pari. The Pale Flame quest will wrap up nicely, and you’ll get that sweet sense of accomplishment—plus whatever loot the quest dishes out.
Looking back, the hunt feels like a breeze once you know the drill. Just remember: Sorush is the MVP, holding the skill button is non-negotiable, and the Asipattravana Swamp rewards the observant eye. Keep this guide bookmarked and you’ll never have to wander aimlessly again. Happy adventuring, and may your glider always catch the right updraft!